How to Reset the forgotten VNC Password
In many occasion we used to forget the passwords. This document describes how to reset the password for RealVNC. We will be modifying the registry of the system. Please make sure that you have good back up copy of your registry.
Please connect to the system which you forgotten the password thru “Connect Network Registry” different system in REGEDIT.
In the box, the enter either IP address or Host name of the server.
You can see the connected server beneath the physical server. If VNC password is enabled, the Registry appears like this:
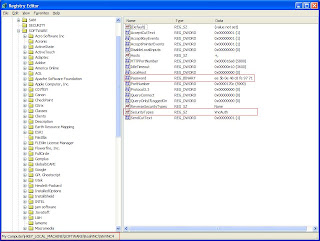
Now, we have to edit both fields which are highlighted by RED box. First, we will reset the password field.
Select the Password and right click on that, then select “Modify”
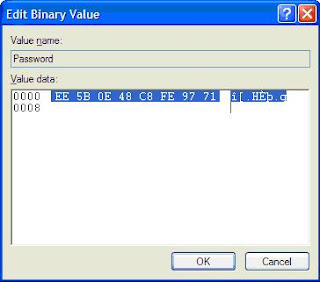
Select those characters and delete them. Press OK and close the box. You can see only “0000”. After close the box, password field shows "Zero-length binary value"
Secondly, we need to modify the “Security Types” field, select the field and click Modify. Then type “None” and close the box.
And refresh the REGEDIT console and try to connect the server without typing any password. OR you can try to restart the VNC service of the server thru Service Console by using “Connect to Another Computer” option.
In many occasion we used to forget the passwords. This document describes how to reset the password for RealVNC. We will be modifying the registry of the system. Please make sure that you have good back up copy of your registry.
Please connect to the system which you forgotten the password thru “Connect Network Registry” different system in REGEDIT.
In the box, the enter either IP address or Host name of the server.
You can see the connected server beneath the physical server. If VNC password is enabled, the Registry appears like this:
Now, we have to edit both fields which are highlighted by RED box. First, we will reset the password field.
Select the Password and right click on that, then select “Modify”

Select those characters and delete them. Press OK and close the box. You can see only “0000”. After close the box, password field shows "Zero-length binary value"
Secondly, we need to modify the “Security Types” field, select the field and click Modify. Then type “None” and close the box.
And refresh the REGEDIT console and try to connect the server without typing any password. OR you can try to restart the VNC service of the server thru Service Console by using “Connect to Another Computer” option.
Comments